Ever bought a MOC and wanted to be able to upload the IO or XML file to a BrickLink wanted list? We have a step-by-step guide with pictures below to help you out. It isn’t as hard as you may think!
BrickLink provides their users with this amazing feature that allows you to upload a list of what you want and they go out, and search all their user’s stores to find the cheapest way for you to buy all the bricks you need.
How to Videos for BrickLink’s Wanted List Feature
How To Upload a BSX, LDR, LXF, or IO file to BrickLink
Step 1: Login To BrickLink
- Open your preferred web browser.
- Log into BrickLink.
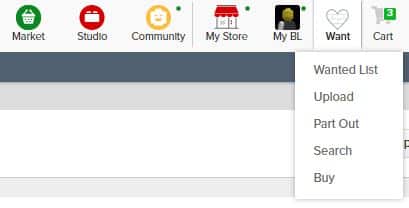
- Along the top bar, you will see a heart with the word ‘Want’, click this.

Step 2: Create A Specific Wanted List
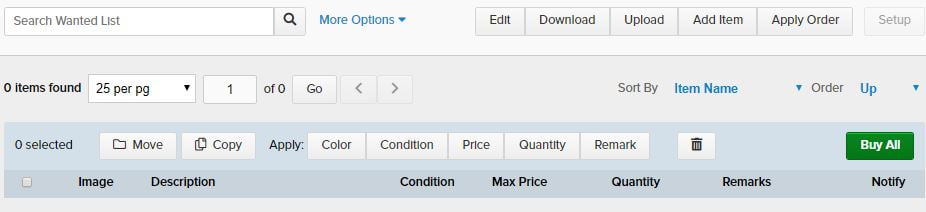
- You will now see a list of any wanted lists you have made. If you have not made any before you will just see the one ‘Default Wanted List.

- In this example, I will just be using the default wanted list but if you wanted to create a specific one-click ‘create a new list and then give it a name, the process is the same once doing this
- Click the wanted list you will be using.
Step 3: Fill Up Your Wanted List With LEGO® Pieces
- Your new wanted list will have 0 items in it, now what we need to do is fill it up with lots of LEGO® pieces!
- Click the upload button in the top row that’s in line with the search field.
- You will now see a window pop up that allows you to drag and drop a BSX, LDR, LXF, or IO file
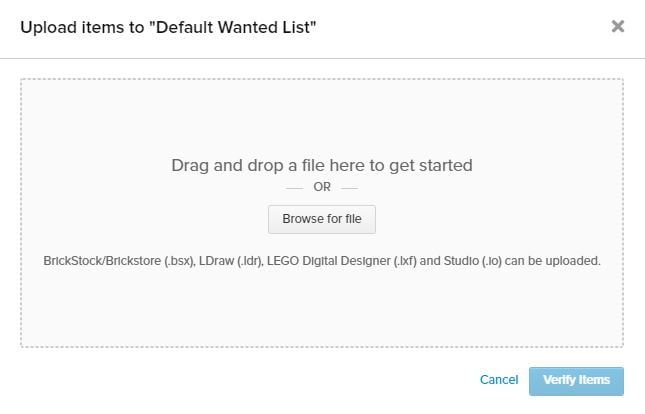
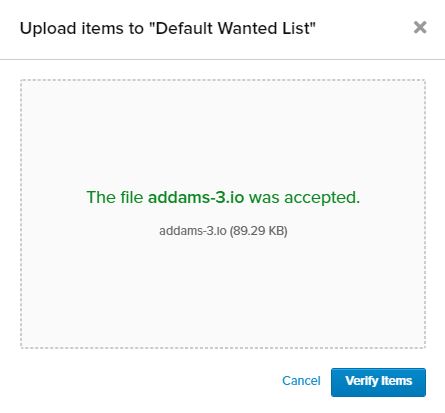
- Either click browses for file or drag and drops your file in this window. Once done it will look like this. Once done click the verify items button to move on.
Step 4: Check Your Wanted List
- If the file has imported the parts correctly you will now see a list of LEGO® bricks and pieces. You are one step closer to buying your bricks from BrickLink!
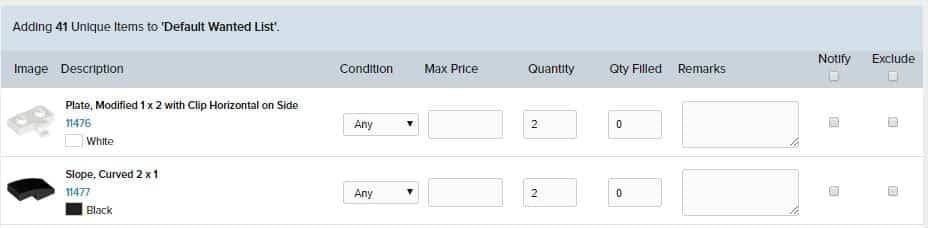
- Make sure it looks right and then scroll right to the bottom and click add to wanted list.
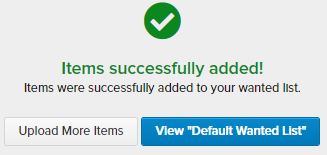
- If everything has gone right you will see something like this. You now need to view your wanted list.
Step 5: Click Buy All
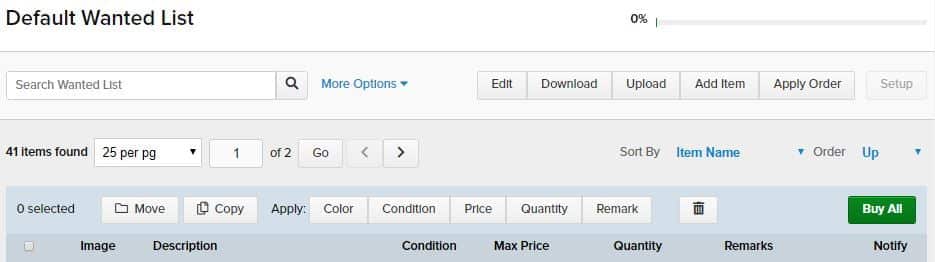
- You should now see that your wanted list has a lot of LEGO® pieces in it. This is the same page we saw at the beginning but it has 0 items in it. In this example, we have 41 items.
- Click the ‘Buy All’ button to proceed to the next step.
Step 6: Use The Right Filters
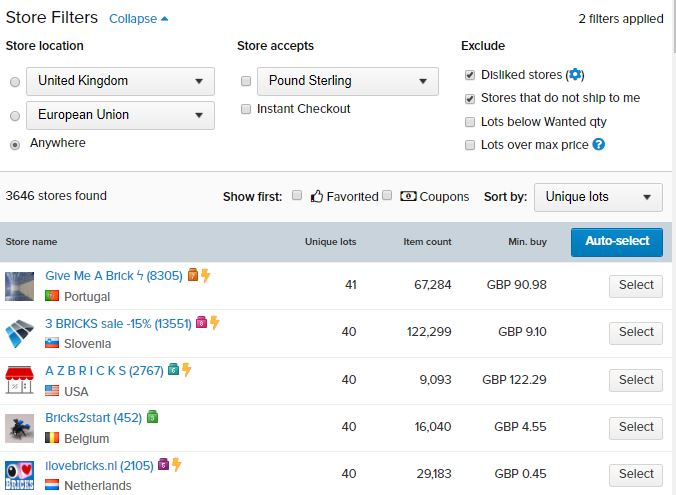
- This stage brings you to the point where BrickLink is amazing, it will search through all the stores and find the best-suited list of sellers to fit the LEGO® pieces you have put in your wanted list.
- On this page you will have some options that you can tweak depending on where you live and what currency you would like to deal in. Do bear in mind that shipping will likely be more if you order from different countries.
Once you are happy with your filters click the auto-select button.
Step 7: Check If The Assigned Numbers Match Each Other
- You will now see a list of stores that BrickLink has found that fit your requirements.
- Make sure to check that the assigned numbers match, in this example my wanted list had 124 pieces and BrickLink was able to source 124 pieces from three different sellers in the UK (I chose to only look at stores in my country).
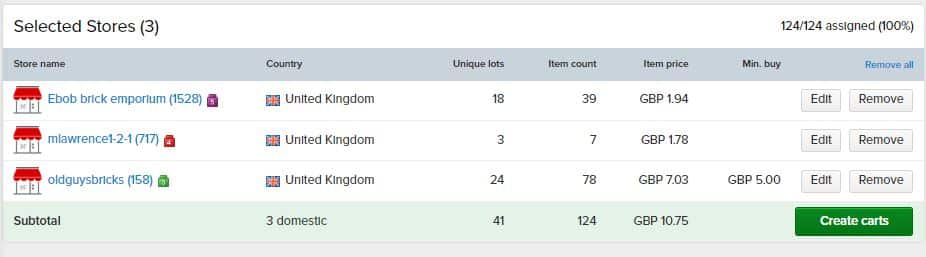
- In the event that the assigned numbers did not match, you can use the ‘Wanted Lists/Wanted Items’ box at the bottom left. This will tell you what pieces are not available

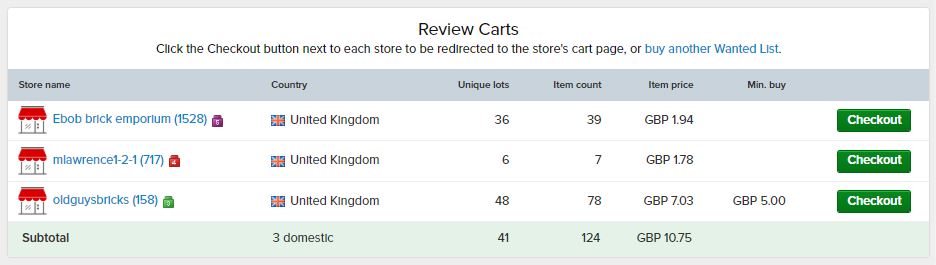
- Now you are happy that your list has all the pieces you wanted in it you can now click ‘Create Carts’. This will take you to a page that has quick links to each store’s checkout page.
At this point when you click checkout, the process is the same as buying from BrickLink without using the wanted list feature.
How To Upload an XML file to BrickLink
Step 1: Login To BrickLink
- Open your preferred web browser.
- Log into BrickLink.
- Along the top bar, you will see a heart with the word ‘Want’, click this.
Step 2: Create A Specific Wanted List
- You will now see a list of any wanted lists you have made. If you have not made any before you will just see the one ‘Default Wanted List.
- In this example, I will just be using the default wanted list but if you wanted to create a specific one-click ‘create a new list and then give it a name, the process is the same once doing this.
Step 3: Click Upload Under Wanted List
- Looking back at the top bar if you hover over the ‘Want’ heart icon you will see a drop-down list appear. Click the ‘Upload’ link.
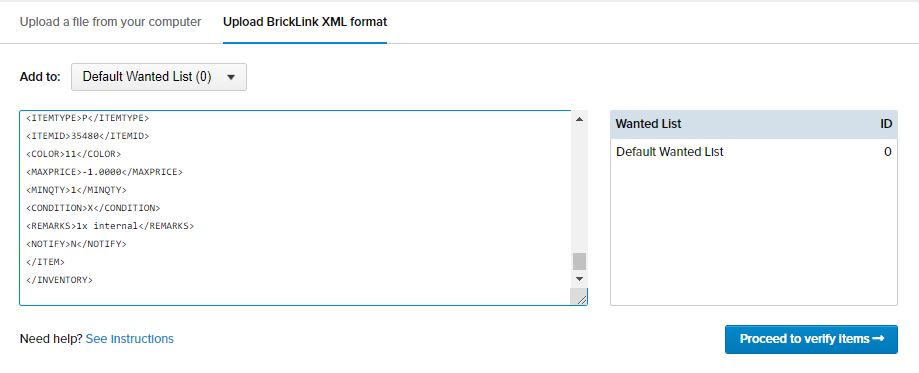
- You will now see on this page that there are two tabs.
Click the one that says uploading it in an XML format, you will now see that the box below the tabs now accepts free text. - I will now walk you through getting the XML code from the file and pasting it into BrickLink.
Step 4: Open The File in Notepad
- For this step I am using a Windows operating system, if you are using a Mac then this may be slightly different for you but the principle is the same.
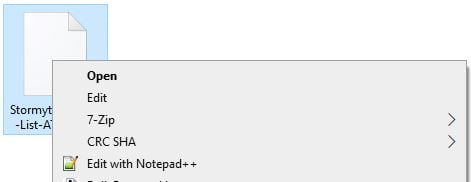
- Right-click the XML file on your PC and click edit.
- The file should have now loaded in notepad.
- You now need to select all of the text in the file. To do this you can either press the keys Ctrl and A together or you can edit from the top and then choose select all.
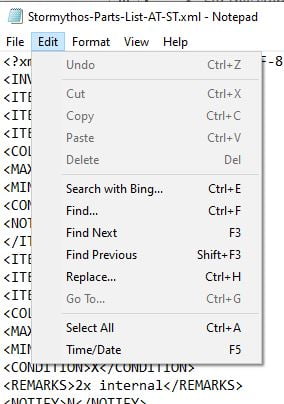
- If everything has been selected you will see that all the text has been highlighted. If it hasn’t tried again.
- Now it’s all highlighted you need to copy the text. You can do this again by going to edit and then copy or you can press the keys Ctrl and X together.
- Go back to BrickLink and paste the text you have copied into the free text field that I mentioned earlier and then click the proceed button.
Step 5: Check If The List Is Correct
- If the parts list from the XML code has been imported correctly you will now see a list of LEGO® bricks and pieces. You are one step closer to buying your bricks from BrickLink!
- Make sure it looks right and then scroll right to the bottom and click add to wanted list.
- If everything has gone right you will see something like this. You now need to view your wanted list.
Step 6: Click Buy All After Another Check
- You should now see that your wanted list has a lot of LEGO® pieces in it. This is the same page we saw at the beginning but it has 0 items in it. In this example, we have 41 items.
- Click the ‘Buy All’ button to proceed to the next step.
Step 7: Choose The Right Filters
- This stage brings you to the point where BrickLink is amazing, it will search through all the stores and find the best-suited list of sellers to fit the LEGO® pieces you have put in your wanted list.
- On this page you will have some options that you can tweak depending on where you live and what currency you would like to deal in. Do bear in mind that shipping will likely be more if you order from different countries.
Once you are happy with your filters click the auto-select button.
Step 8: Check If The Numbers Match Each Other
- You will now see a list of stores that BrickLink has found that fit your requirements.
- Make sure to check that the assigned numbers match, in this example my wanted list had 124 pieces and BrickLink was able to source 124 pieces from three different sellers in the UK (I chose to only look at stores in my country).
- In the event that the assigned numbers did not match, you can use the ‘Wanted Lists/Wanted Items’ box at the bottom left. This will tell you what pieces are not available
- Now you are happy that your list has all the pieces you wanted in it you can now click ‘Create Carts’. This will take you to a page that has quick links to each store’s checkout page.
At this point when you click checkout, the process is the same as buying from BrickLink without using the wanted list feature.

